IncludeOS on Google Compute Engine
Starting with IncludeOS version 0.10, you can run IncludeOS services in the cloud using Google Compute Engine (GCE) in addition to the already existing OpenStack support. In this blog post, I will first go through the process using GCE’s web-based user interface. Then I will show how to perform the same operations using the Google Cloud SDK command line tools. Finally we will look at a simple shell script that lets you effortlessly upload and run IncludeOS services in Compute Engine.
In this blog post, I’ll use the demo_service from the IncludeOS examples folder, and I’ll assume that you have already successfully downloaded IncludeOS, set up the development environment and know how to build and run IncludeOS services. I will also assume that you have signed up for the Google Cloud Platform service.
Preparing the image
To run IncludeOS services in GCE, your service image needs to have a GRUB bootloader. The IncludeOS boot tool can add this to your service if you specify the -g flag:
$ boot -g IncludeOS_example
This will create a new file called IncludeOS_example.grub.img.
(If you are using macOS, the boot -g option is not available. Instead, you can use a Docker container to add the GRUB bootloader.)
Then you need to prepare your image for uploading. It is important to follow GCE’s naming requirements. The disk image must be named disk.raw and it has to be uploaded inside a tar.gz file that uses gzip compression, so create a file with the correct name and add it to a new tar.gz archive:
$ cp IncludeOS_example.grub.img disk.raw
$ tar -zcf includeos_image.tar.gz disk.raw
(If you are using macOS, it is imperative that you use GNU tar, not the default (BSD) tar that is included with macOS. You can install GNU tar using Homebrew: brew install gnu-tar, and substitute gtar for tar in the above command.)
Using the web interface
Now it is finally time to log in to the Google Cloud Platform dashboard.
To be able to create instances based on your newly created image, you will have to upload your image to a Google Storage bucket. Navigate to the Storage section, and create a new bucket for your IncludeOS images.

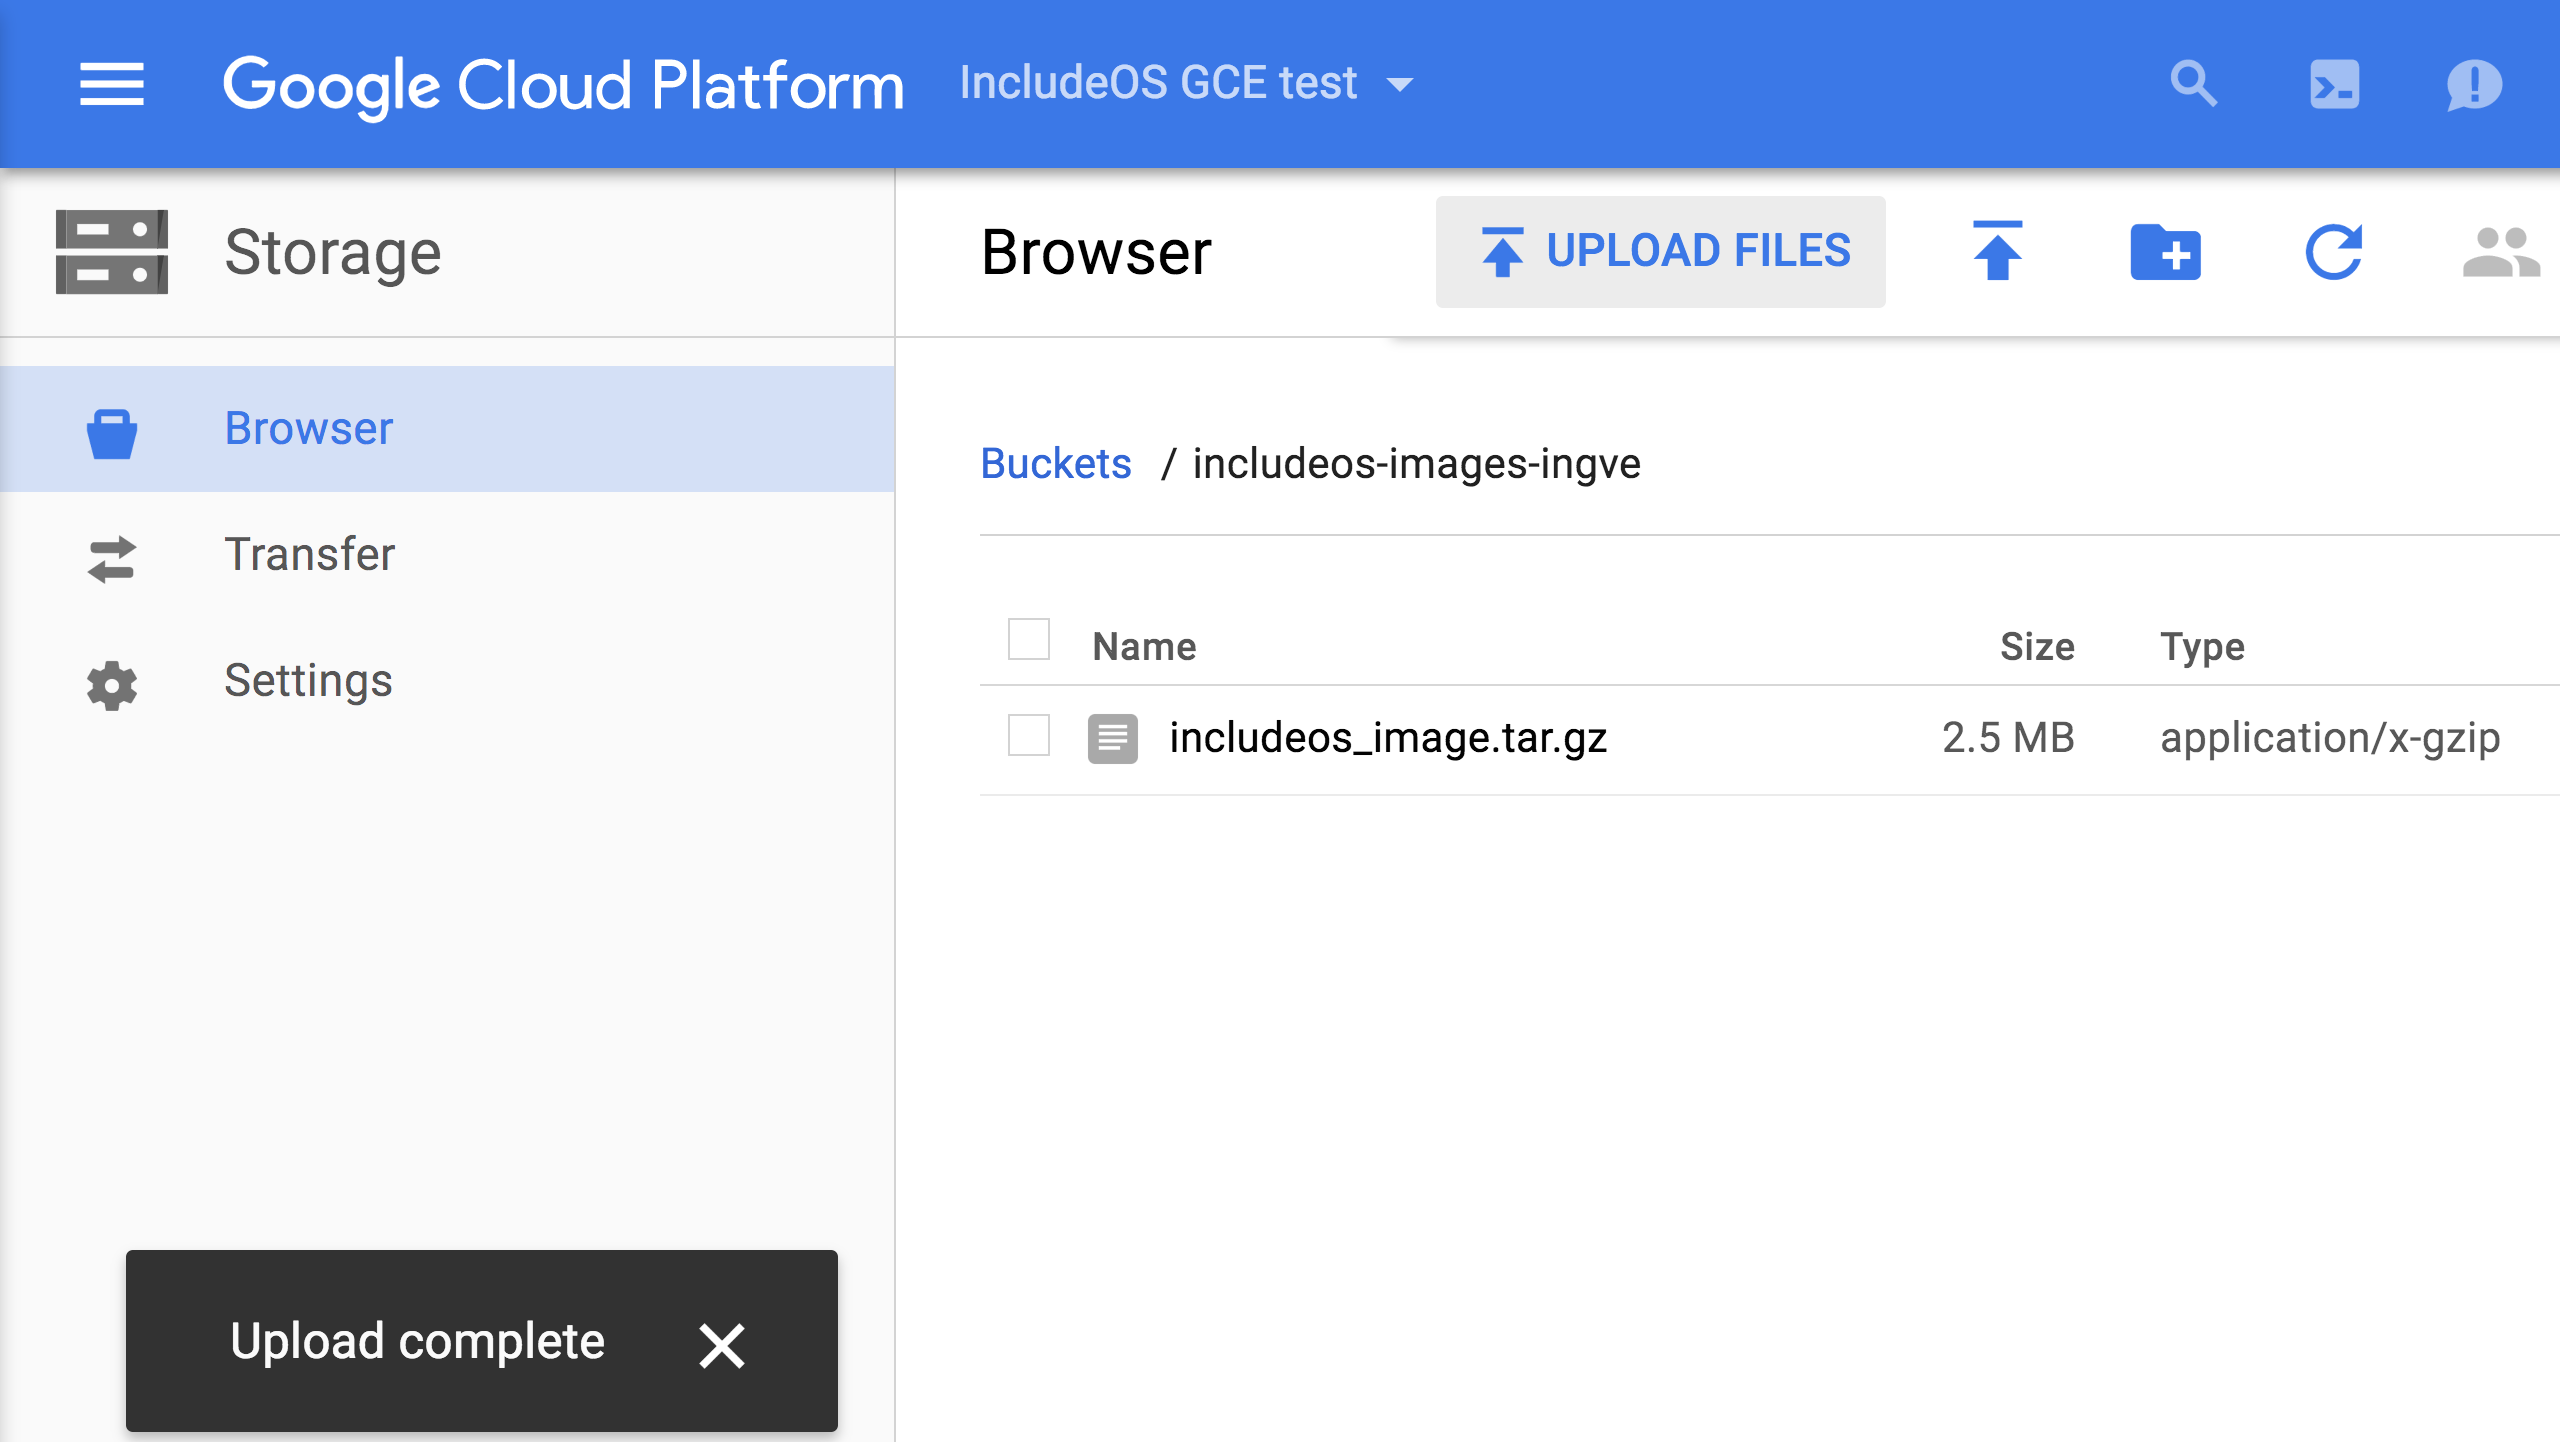
After you have created your bucket, you can upload the tar.gz file you created earlier.
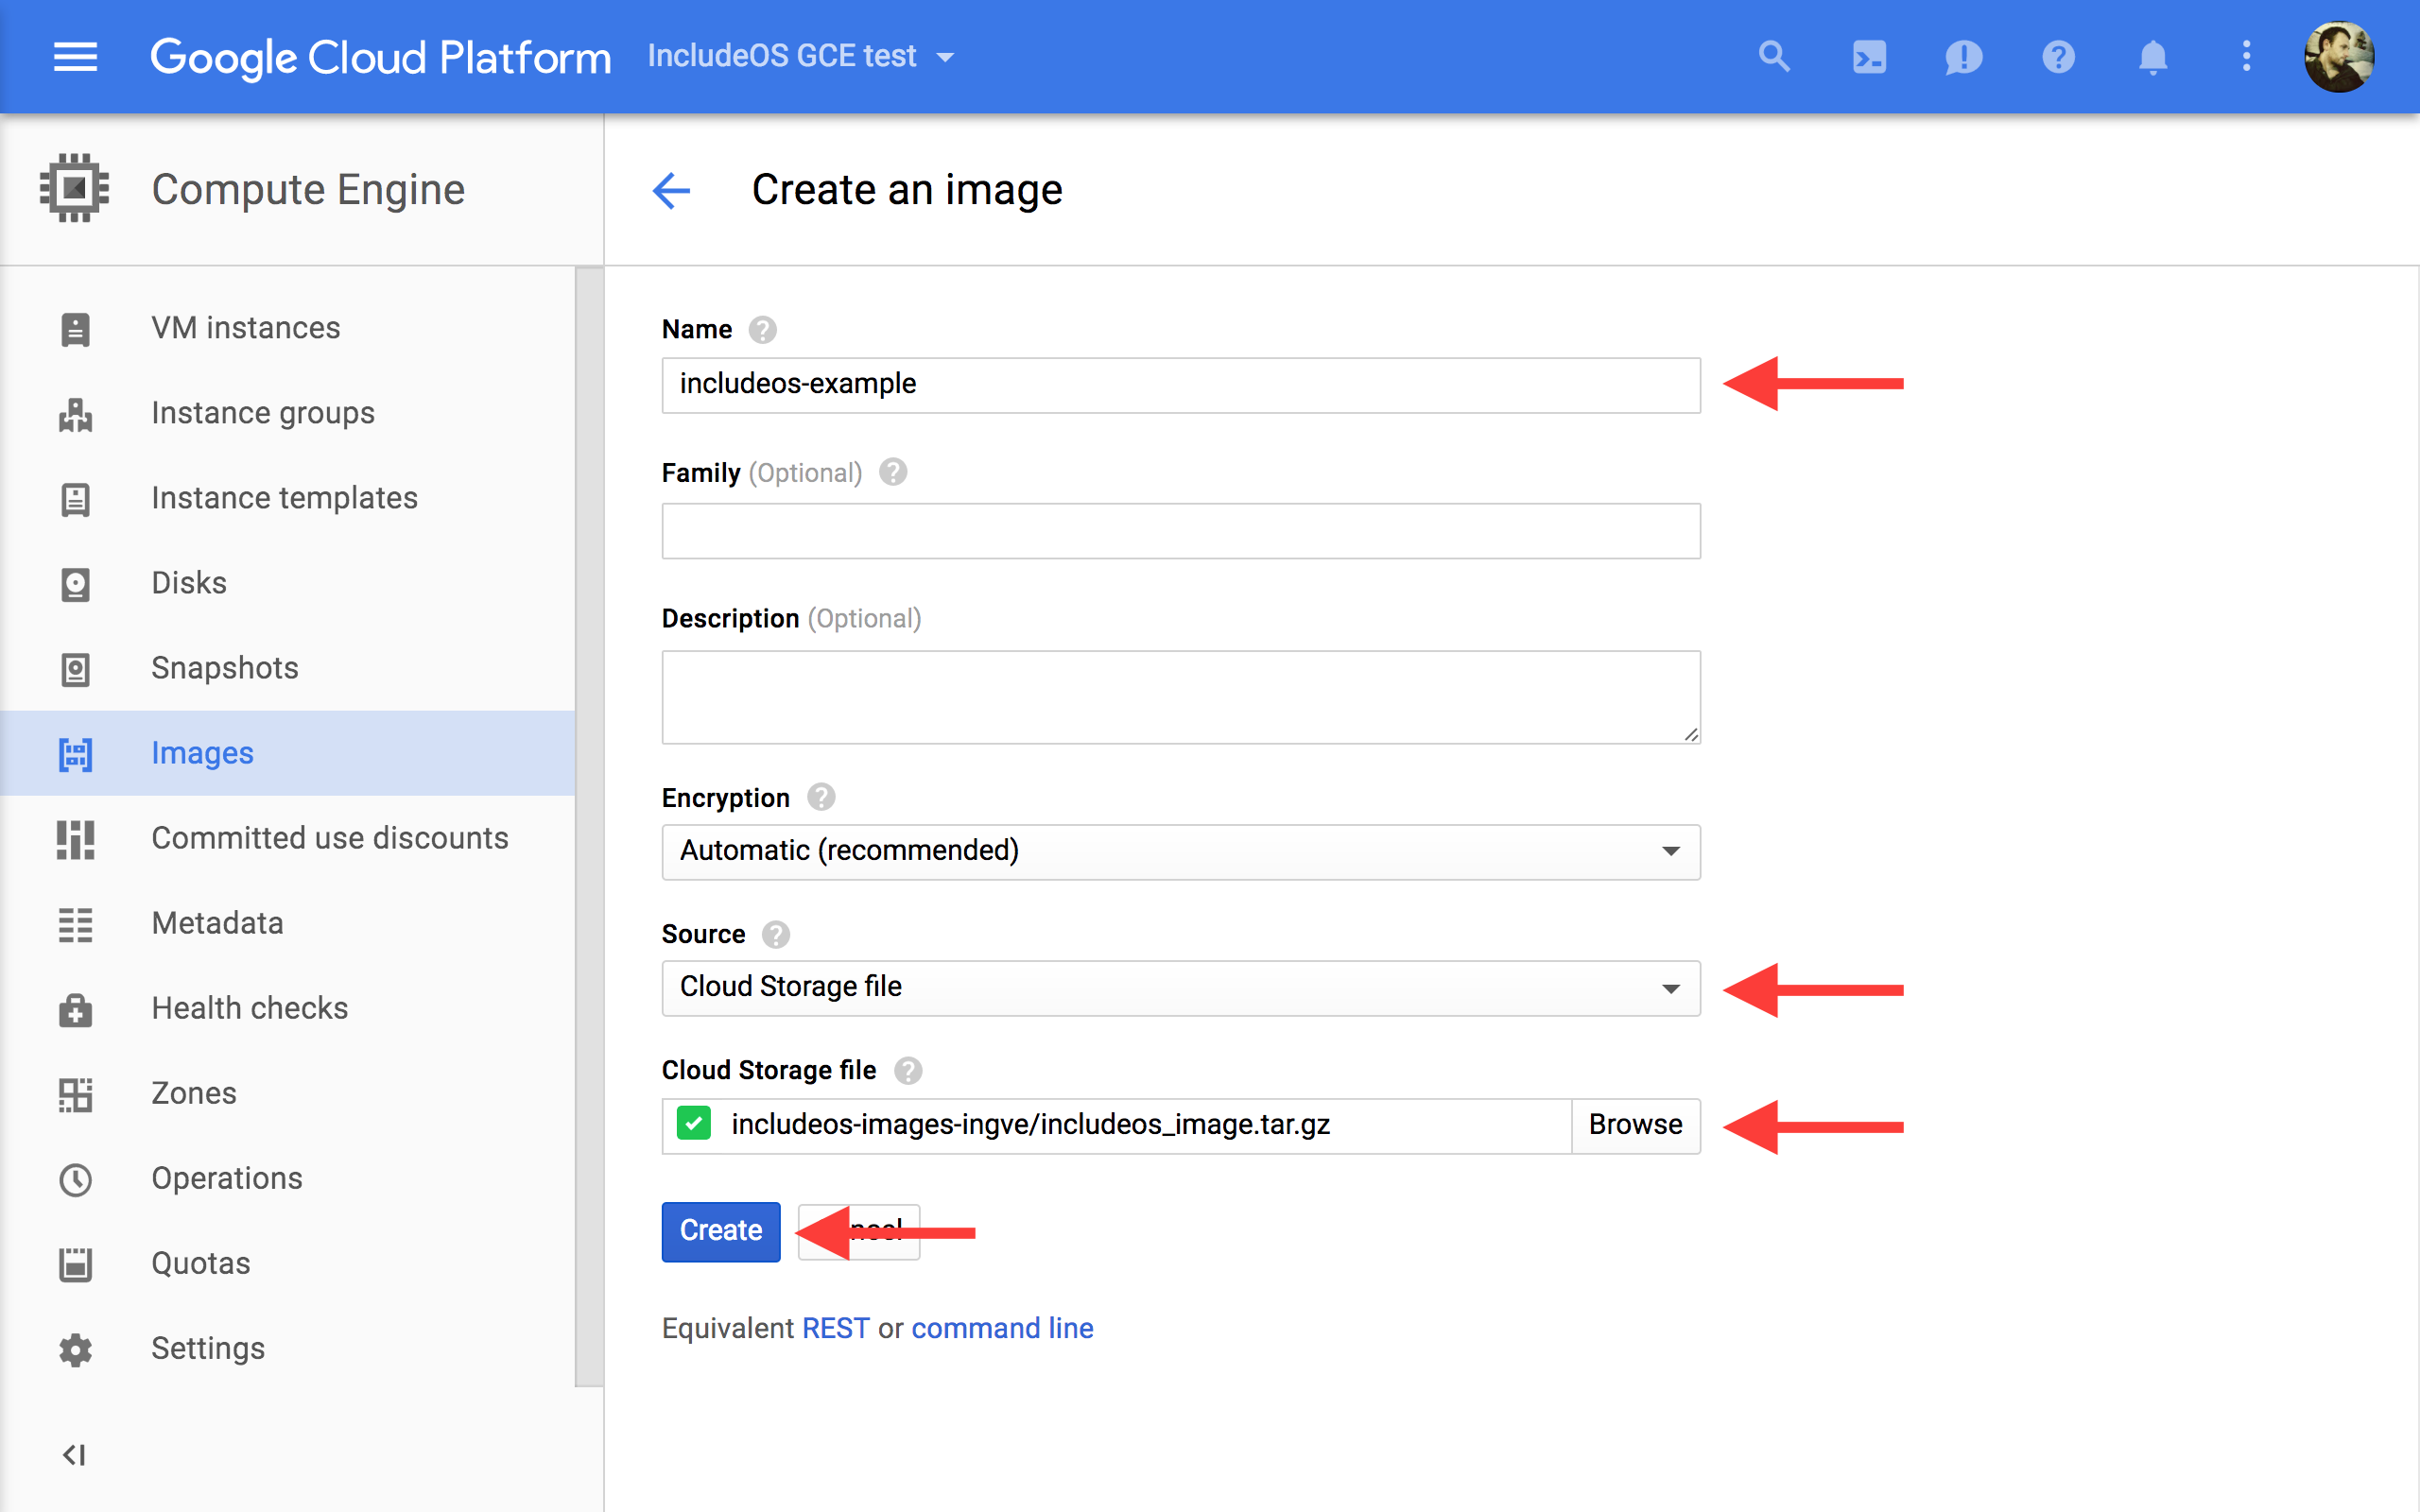
Now you can create a GCE image. Navigate to the Compute Engine section and select the Images submenu. Initially you’ll just see a long list of predefined Linux and Windows images, but at the top of the list there is a Create Image option where you can configure your image. Give your image a name, and optionally add a description. In the Source field, select Cloud Storage file and select the tar.gz file from the bucket you created earlier.
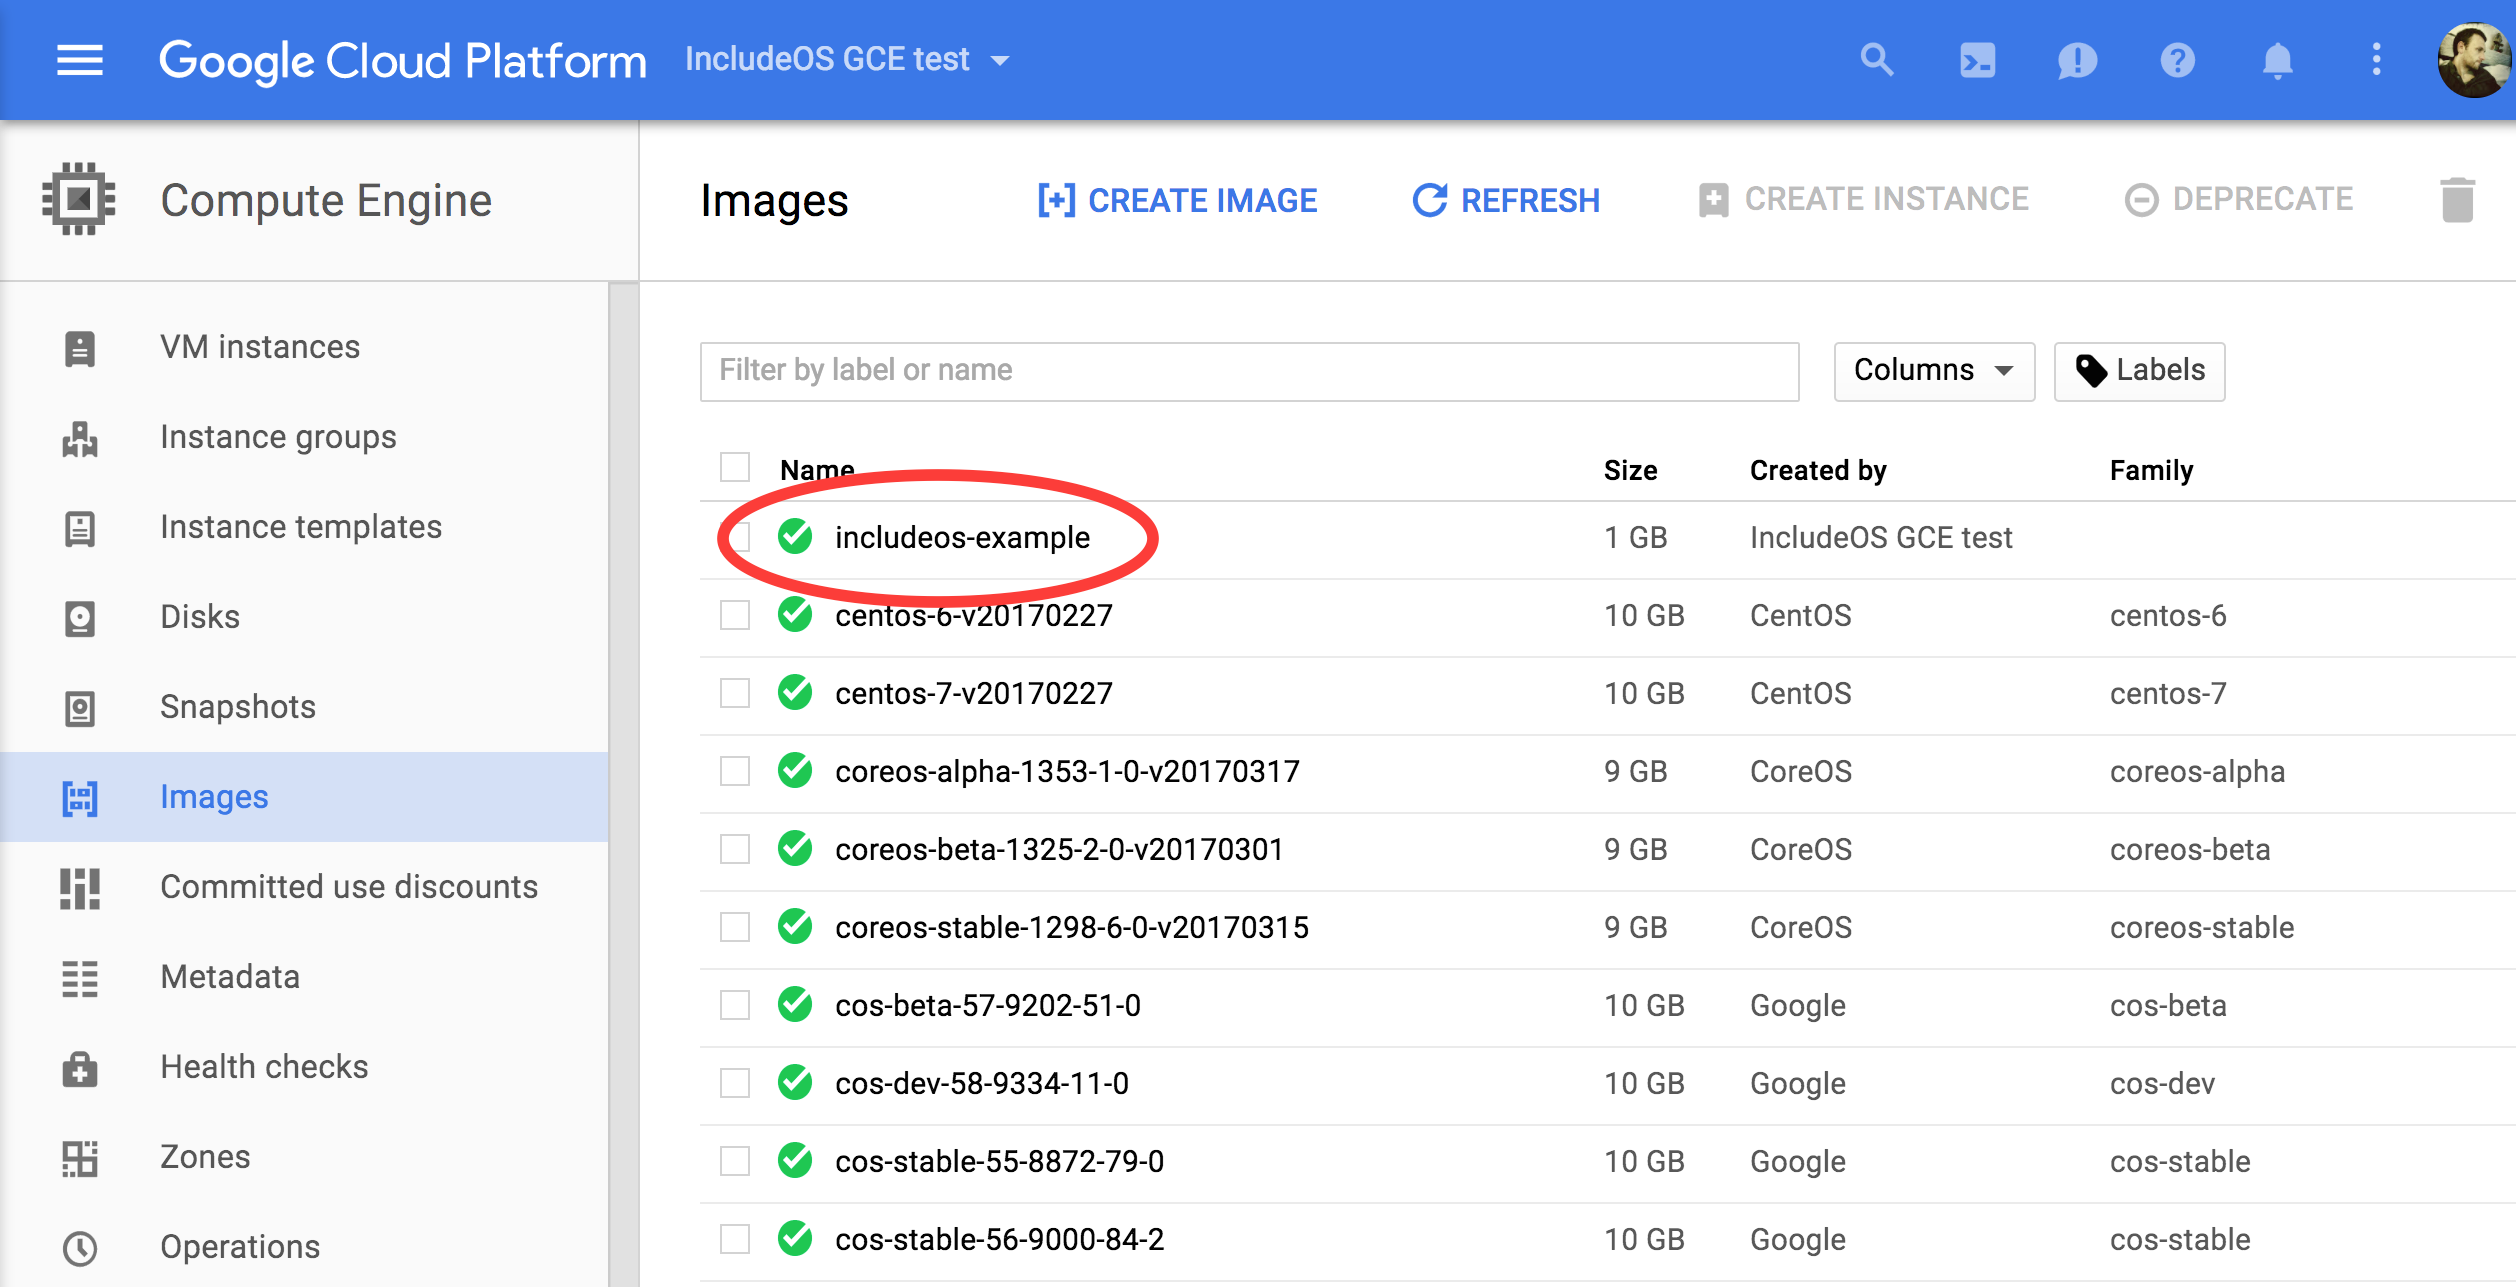
Finally, press the Create button to finish the image creation process, and you will be taken back to the list of images, which now includes your newly created image.
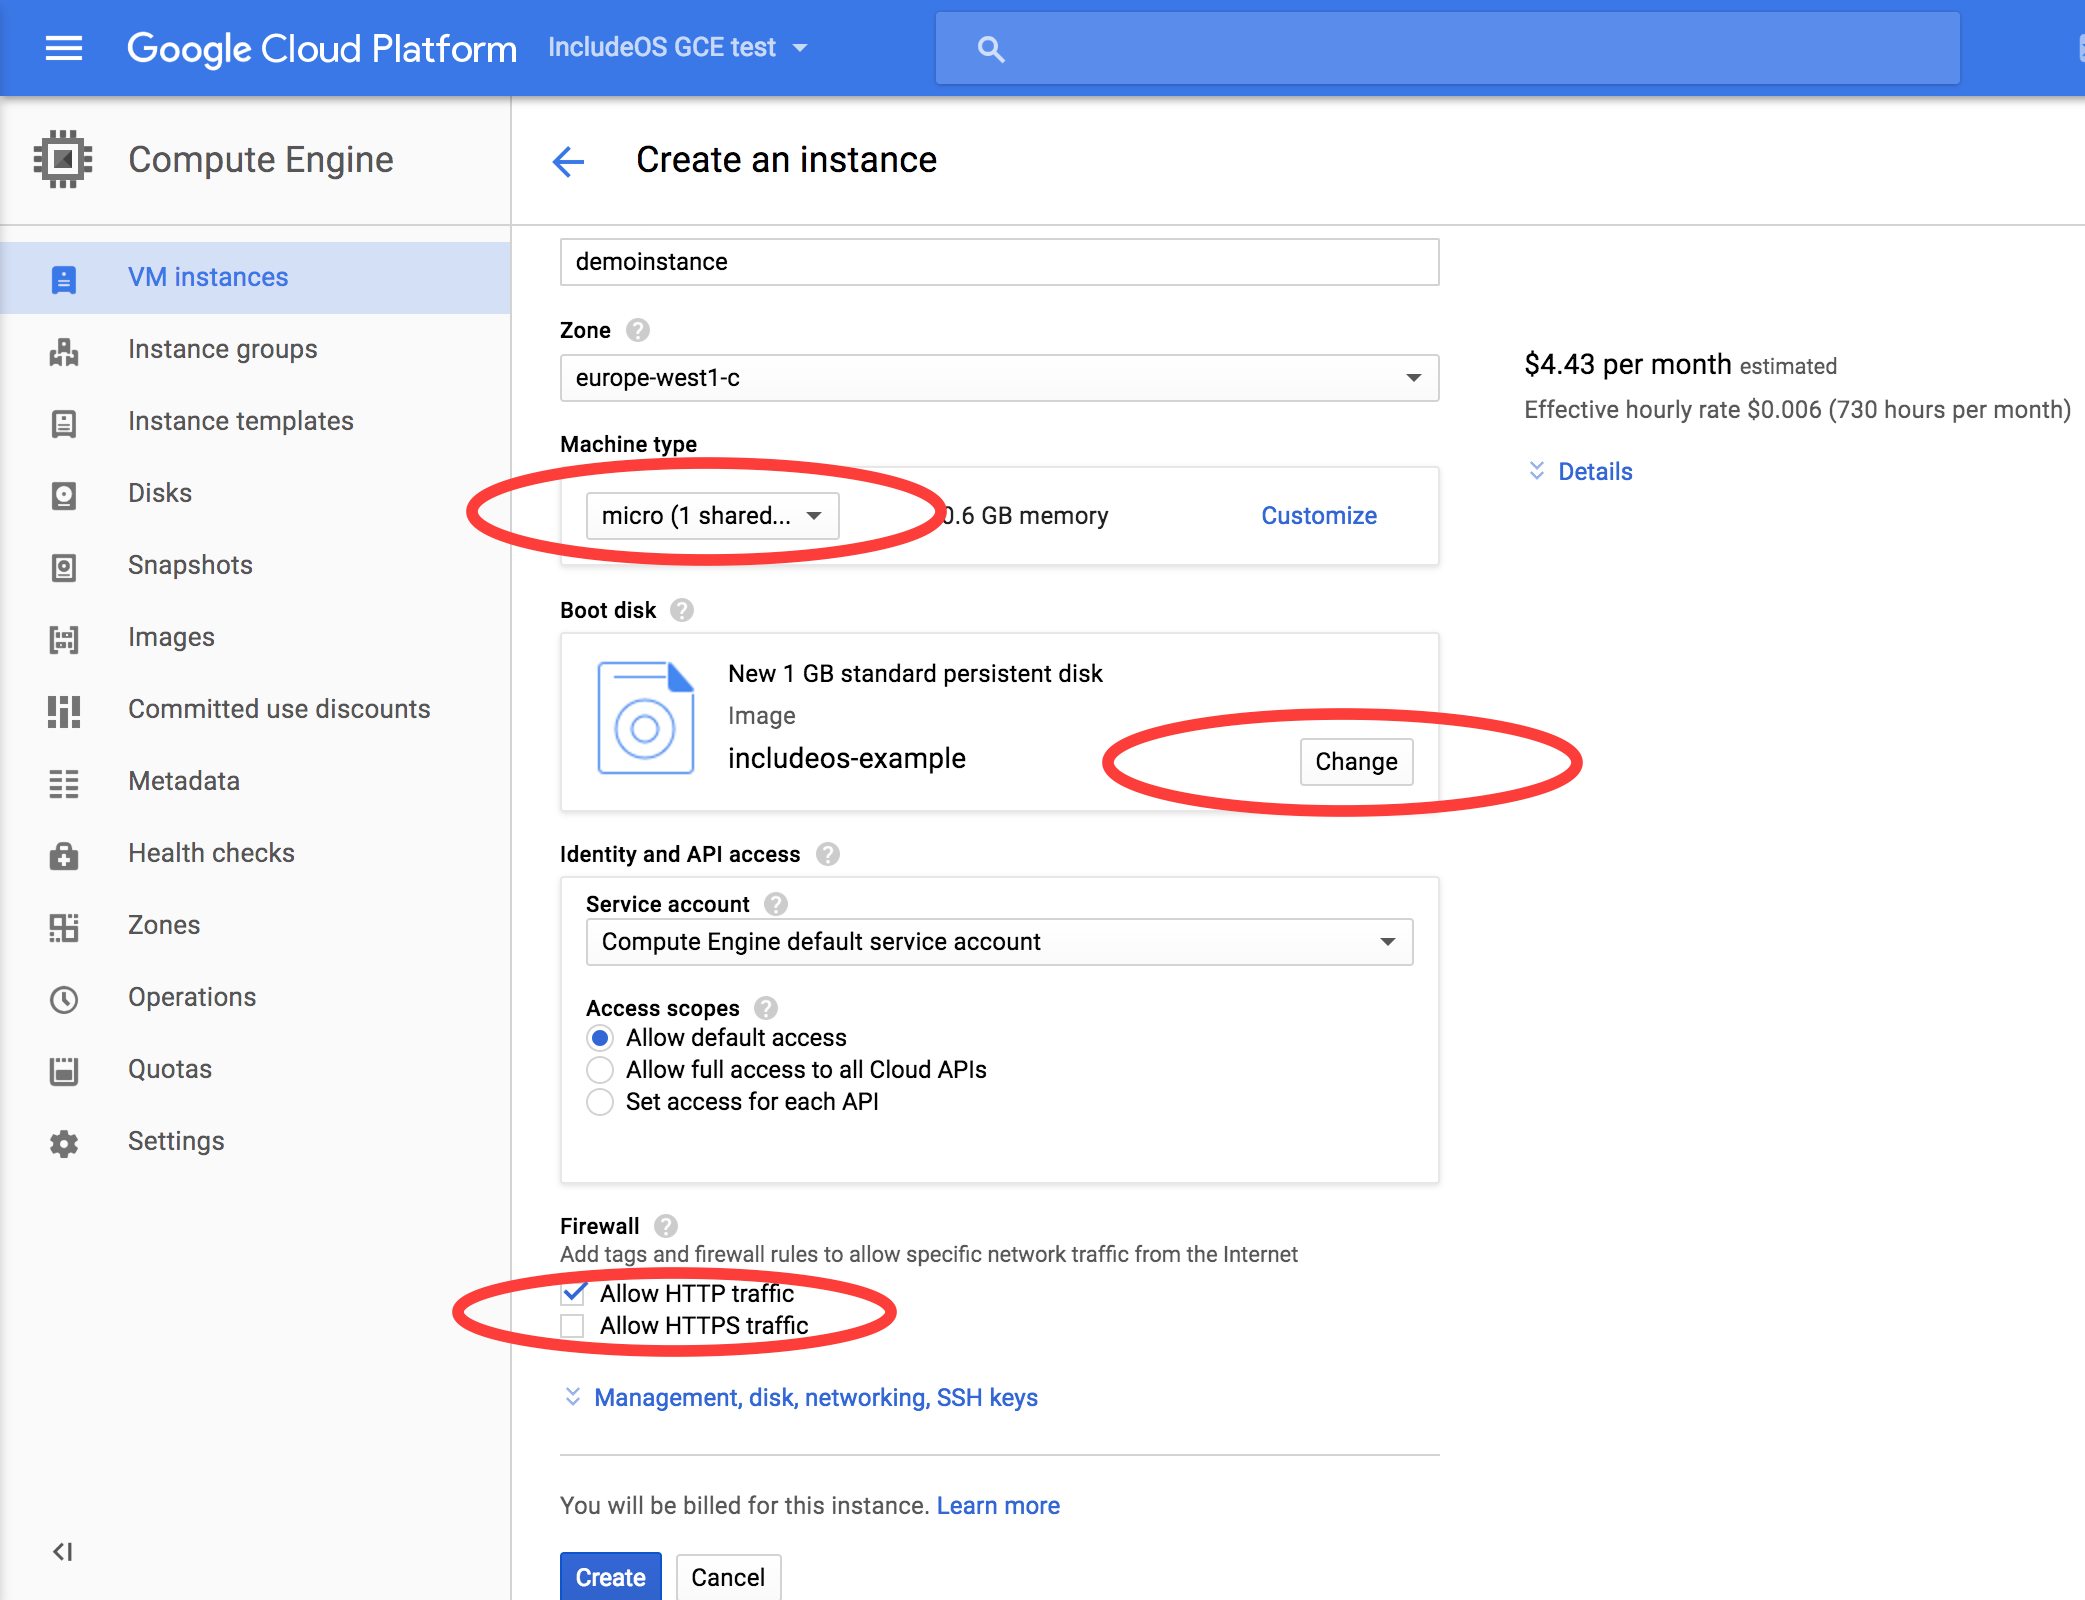
Navigate to the VM Instances menu options. Since you do not have any VM instances yet, GCE helpfully displays a dialog where you can create or import a VM instance. Select Create to get another dialog where you can configure your instance. The GCE defaults are appropriate for Linux VMs, but you’ll want to make a few changes for IncludeOS services.
The most important thing to change is the Boot disk entry. Press the Change button to get a new set of options. Under the Custom Images heading, you will now be able to select the image you just created. This takes you back to the Create an Instance dialog, where you can make any other required modifications to your instance. For this simple demo service you can use the very affordable micro (1 shared vCPU) machine type, and in the Firewall settings, you should select Allow HTTP traffic.
When you’re happy with your choices, press Create to create and start your instance.
If you go back to the VM instances screen, you will see your newly created instance with a green checkmark, indicating that it is running. The instance’s internal and external IP addresses are also shown.

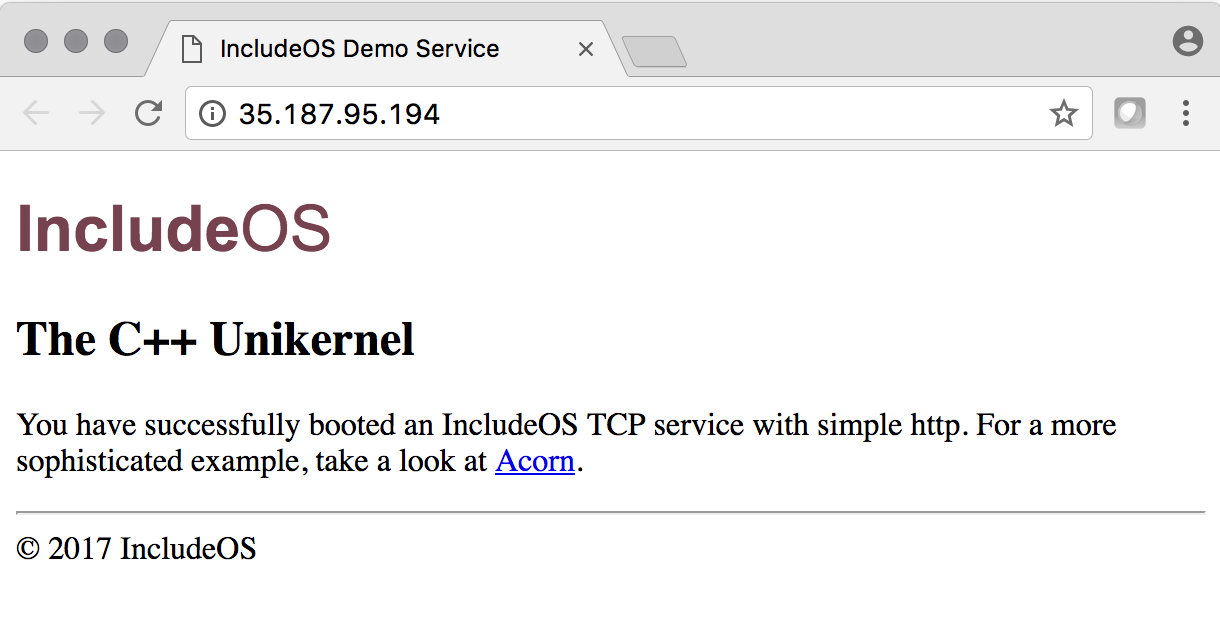
Click on the instance to get detailed information about the instance. To verify that the instance is in fact replying to HTTP requests, visit the IP address that is listed in the External IP field using your favourite web browser:
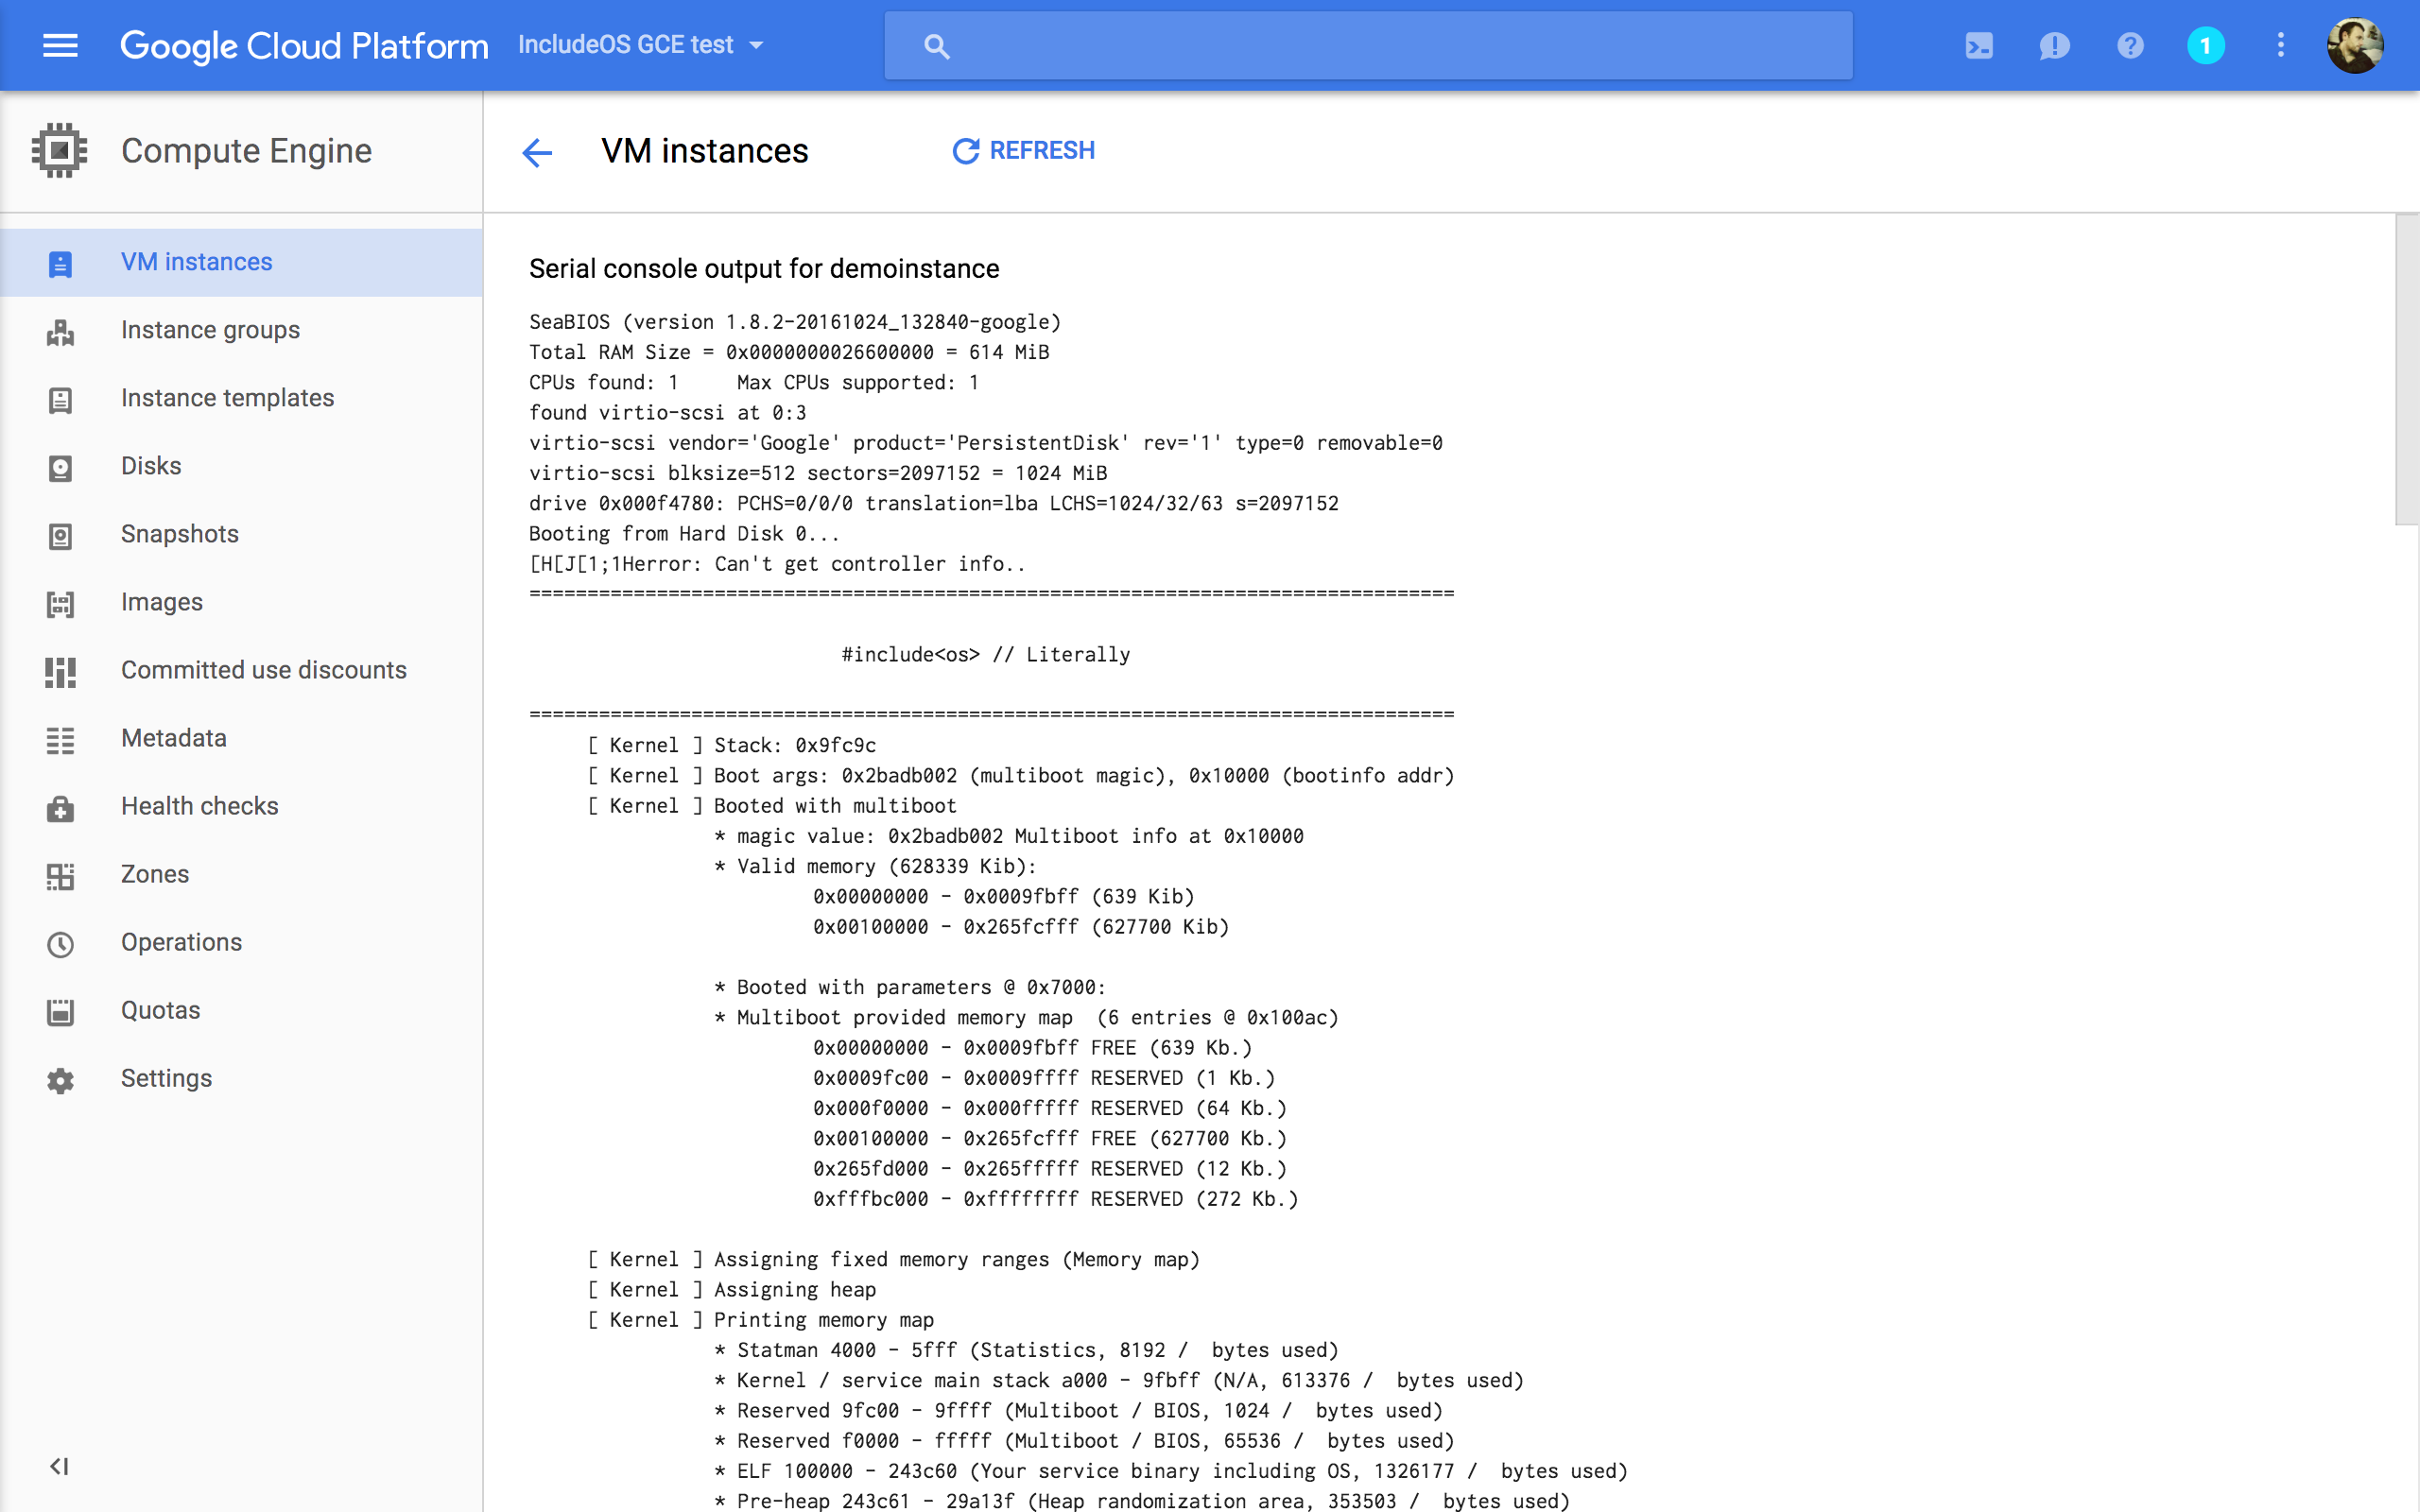
You can also examine the log from the running instance. By default, IncludeOS services use the serial port for logging, and the serial output is available in the GCE web user interface by pressing the View serial port button.
To stop your instance, select Stop from the instance’s dropdown menu, and to delete your instance, select Delete from the instance’s dropdown menu.

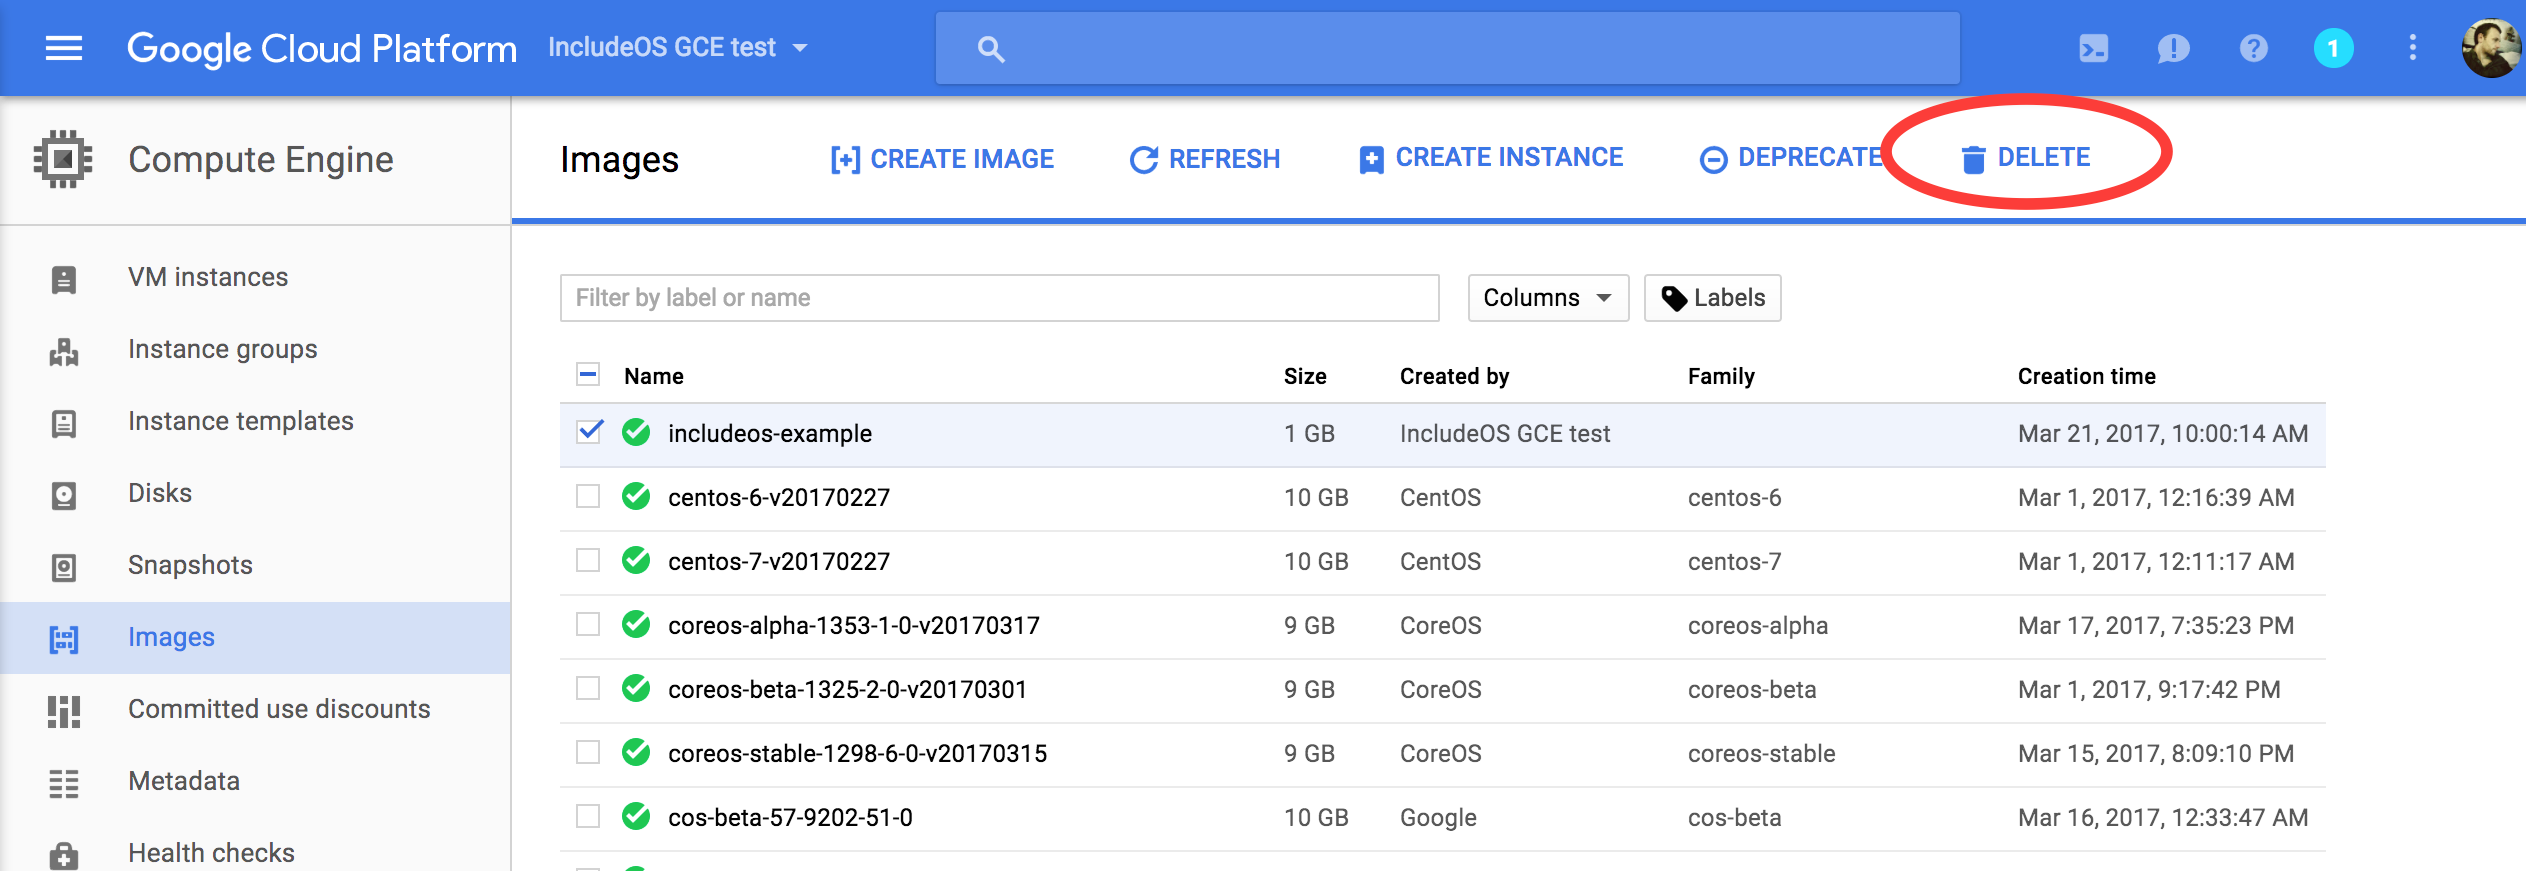
If you won’t be starting any further instances of this image, you can delete the GCE image.
And finally you can delete the tar.gz file containing the IncludeOS image from your Google Storage bucket.

Using the command line
If you haven’t already installed the Google Cloud SDK, now would be a good time. The first time you use Google Cloud tools, you’ll have to authenticate. Open a new tmux pane, and initiate the authentication process:
$ gcloud init --console-only
Now you’re ready to upload IncludeOS services, create GCE images and start GCE instances from the command line.
First you should upload your gzipped IncludeOS image to your Google Storage bucket (if the bucket already contains an image with the same name, this will overwrite it, so use the -n (“no-clobber”) option if you want to keep older versions.)
$ gsutil cp includeos_image.tar.gz gs://includeos-images-ingve/includeos_image.tar.gz
Copying file://includeos_image.tar.gz [Content-Type=application/x-tar]...
| [1 files][  2.5 MiB/  2.5 MiB]
Operation completed over 1 objects/2.5 MiB.
Now you can create a GCE image using the images create subcommand:
$ gcloud compute images create demoservice --source-uri gs://includeos-images-ingve/includeos_image.tar.gz
Created [https://www.googleapis.com/compute/v1/projects/includeos-gce-test/global/images/demoservice].
NAME         PROJECT             FAMILY  DEPRECATED  STATUS
demoservice  includeos-gce-test                      READY
Once the demoservice GCE image has been created, you can start an instance using the instances create subcommand:
$ gcloud compute instances create demoinstance --image demoservice --machine-type f1-micro --zone europe-west1-c --tags http-server
Created [https://www.googleapis.com/compute/v1/projects/includeos-gce-test/zones/europe-west1-c/instances/demoinstance].
NAME          ZONE            MACHINE_TYPE  PREEMPTIBLE  INTERNAL_IP  EXTERNAL_IP     STATUS
demoinstance  europe-west1-c  f1-micro                   10.132.0.2   35.187.103.216  RUNNING
Again, if you visit the IP address listed in the EXTERNAL_IP field, you’ll see the now familiar IncludeOS demo web page:

To see the serial output, use the tail-serial-port-output command:
$ gcloud compute instances tail-serial-port-output demoinstance
SeaBIOS (version 1.8.2-20161024_132840-google)
Total RAM Size = 0x0000000026600000 = 614 MiB
CPUs found: 1     Max CPUs supported: 1
found virtio-scsi at 0:3
virtio-scsi vendor='Google' product='PersistentDisk' rev='1' type=0 removable=0
virtio-scsi blksize=512 sectors=2097152 = 1024 MiB
drive 0x000f4780: PCHS=0/0/0 translation=lba LCHS=1024/32/63 s=2097152
Booting from Hard Disk 0...

[...]

<Service> @on_connect: Connection 195.159.159.10:56897 successfully established.
<Service> @on_read: 354 bytes received.
<Service> Request:
GET / HTTP/1.1
Host: 35.187.103.216
User-Agent: Mozilla/5.0 (Macintosh; Intel Mac OS X 10.11; rv:52.0) Gecko/20100101 Firefox/52.0
Accept: text/html,application/xhtml+xml,application/xml;q=0.9,*/*;q=0.8
Accept-Language: en-US,en;q=0.5
Accept-Encoding: gzip, deflate
Connection: keep-alive
Upgrade-Insecure-Requests: 1
Cache-Control: max-age=0


<Service> Responding with 200 OK.
<Service> @on_write: 714 bytes written.

[...]
When you’re done testing your instance, you can stop it using the instances stop subcommand and delete it using the instances delete subcommand:
$ gcloud compute instances stop demoinstance
Updated [https://www.googleapis.com/compute/v1/projects/includeos-gce-test/zones/europe-west1-c/instances/demoinstance].
$ gcloud compute instances delete demoinstance
The following instances will be deleted. Attached disks configured to
be auto-deleted will be deleted unless they are attached to any other
instances. Deleting a disk is irreversible and any data on the disk
will be lost.
 - [demoinstance] in [europe-west1-c]

Do you want to continue (Y/n)?

Deleted [https://www.googleapis.com/compute/v1/projects/includeos-gce-test/zones/europe-west1-c/instances/demoinstance].
You should also delete the underlying GCE image using the images delete subcommand:
$ gcloud compute images delete demoservice
The following images will be deleted:
 - [demoservice]

Do you want to continue (Y/n)?

Deleted [https://www.googleapis.com/compute/v1/projects/includeos-gce-test/global/images/demoservice].
Finally, delete the tar.gz file from your Google Storage bucket using the gsutil rm command:
$ gsutil rm gs://includeos-images-ingve/includeos_image.tar.gz
Removing gs://includeos-images-ingve/includeos_image.tar.gz...
/ [1 objects]
Operation completed over 1 objects.
A script for launching IncludeOS images in GCE
Most of the above commands take a -q (“quiet”) parameter which prevents the commands from reporting progress information and from asking for confirmation. Here is a simple skeleton bash script that you can adapt to your needs (at the very least, you’ll almost certainly want to change the bucket and zone variables):
#! /bin/bash

# guess_image unless it's provided
ptn="*.img"
images=( $ptn )
guessed_image="${images[0]}"

includeos_image=${1-$guessed_image}

bucket=my-includeos-images

# GCE has a strict regex for file names
# Dots to hyphens
image_name=`echo $includeos_image | tr . -`
# Upper- to lowercase
image_name=`echo "$image_name" | tr '[:upper:]' '[:lower:]'`

tarfile=$includeos_image.tar.gz
instance_name=$image_name
zone=europe-west1-b

echo "Deploying $includeos_image as $image_name to $bucket"

echo ">>> Creating tarfile "
cp $includeos_image disk.raw
tar -zcf $tarfile disk.raw

echo ">>> Uploading (previous image will be overwritten) "
gsutil mv $tarfile gs://$bucket/$tarfile

# echo ">>> Deleting previous image"
gcloud compute images -q delete $image_name

echo ">>> Creating image"
gcloud compute images -q create  $image_name --source-uri gs://$bucket/$tarfile

# echo ">>> Deleting previous instance"
gcloud compute instances -q delete $instance_name --zone $zone

echo ">>> Creating instance"
gcloud compute instances -q create $instance_name --image $image_name --machine-type f1-micro --zone $zone --tags http-server